* Special thanks to Hardy and the Pomona College machine shop for help on these ones
Hangboards
A pretty nifty tool to have outside is a warm up board that you can pull on and get your fingers good to go. You can hang them from a tree and do some rudimentary hangs, or brace the rope on your feet and stretch out your fingers.
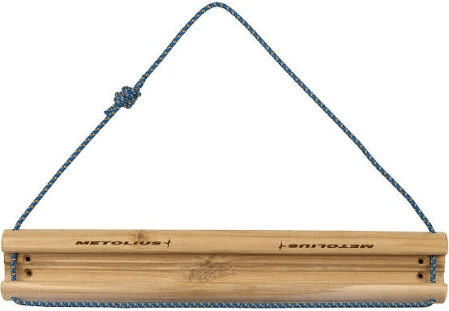
These are sold by a myriad of companies, but can be quite pricey, ranging from 30-80 dollars for what amounts to a piece of carved up wood. I decided to make my own albeit a bit more trashy and misshapen.
I start out with a slab of scrap wood, trim off any chunks that I don’t want with a bandsaw, and clean up any defects. I want two rails for my board, a 15mm one and a 20mm one. To achieve this, I use a routing table to carve out my desired measurements, round off the edges, and round off the top of the board as well for use as a sloper. I then press some small holes in the top corners, slide some rope through, and call it a day. Since this thing is made of scrap wood, I am slightly apprehensive about putting all my weight on it, but it works very well for what it is and nothing seems to have exploded or splintered into pieces just quite yet.
Holds
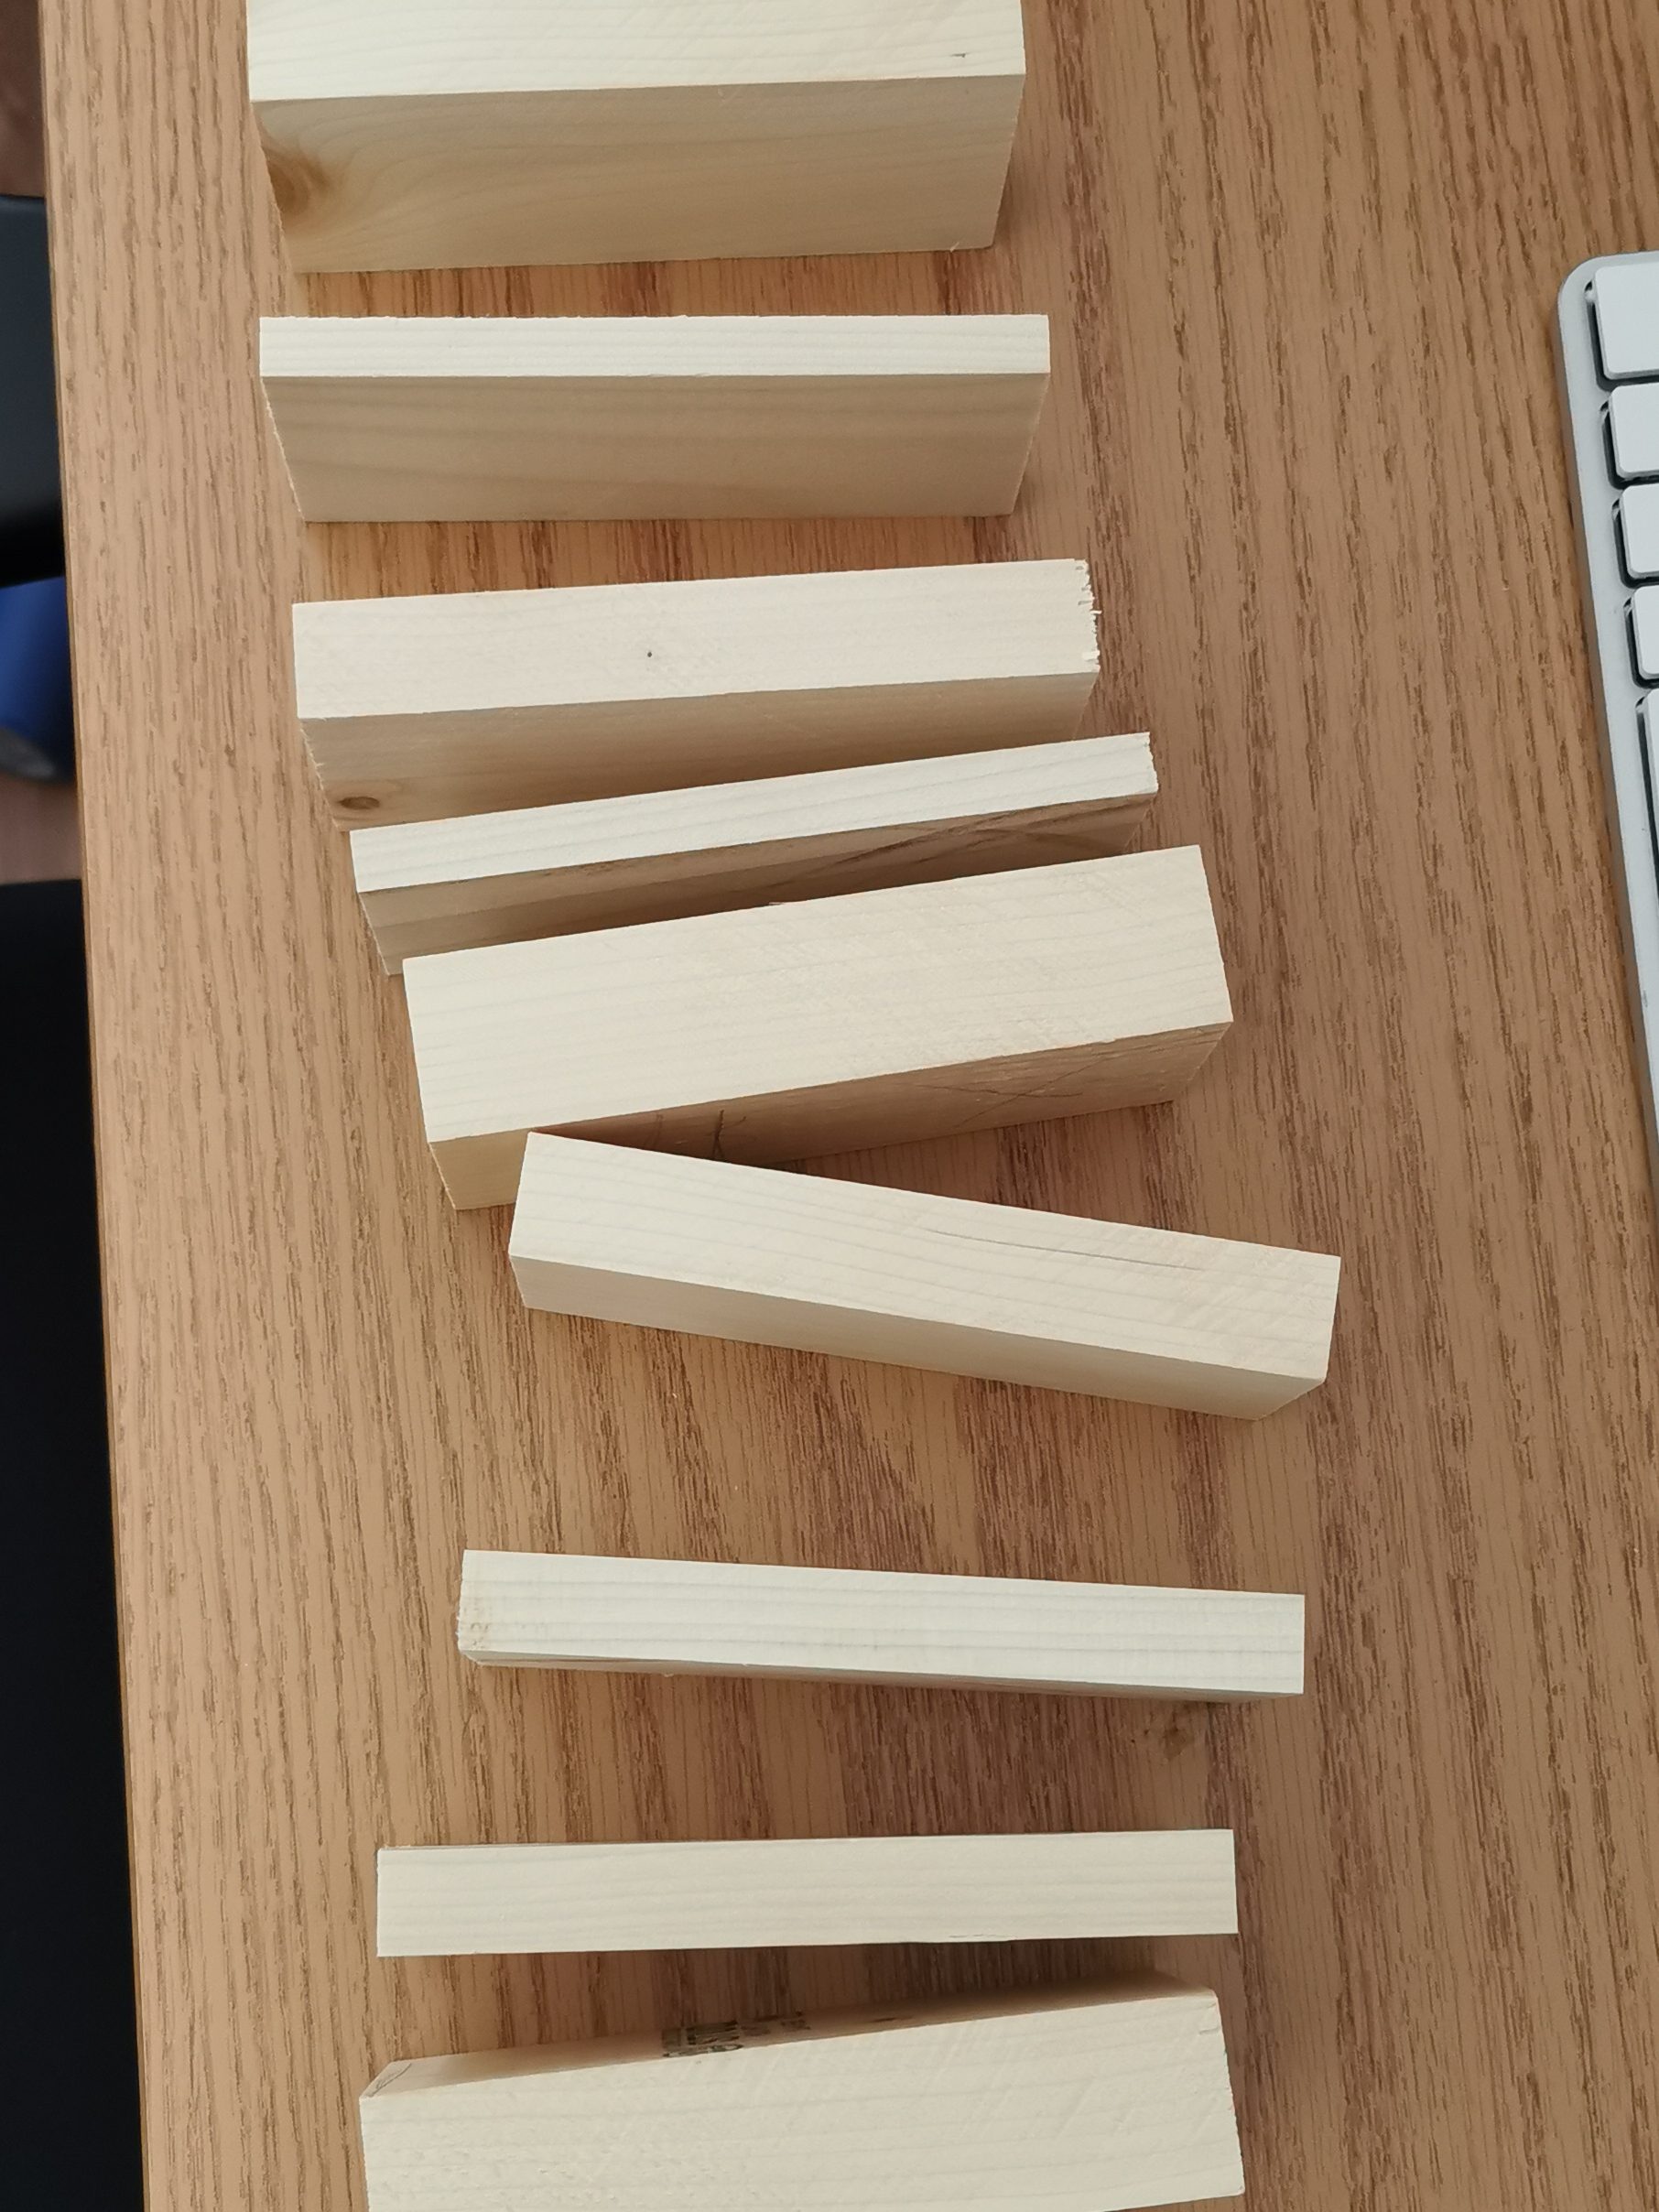
I wanted to make some wooden hangboard holds as a grad gift for my friend Jacob. I decided to make two 35mm, 20mm, 15mm, and 10mm holds, as well as one additional 20mm hold for some one-arm stuff.
I turn some basic planks of wood into hangboard-size blocks with the help of a bandsaw. I choose to go with small blocks instead of the standard long strips so that Jacob can turn them sideways to use as pinches, or as little campus blocks to move around on.
Now that I have the general size, its time to shape them. I want to shape these holds such that one side is a tapered crimp and another side is a round sloper. Maximum utility! This is achieved with the aid of a belt-sander.
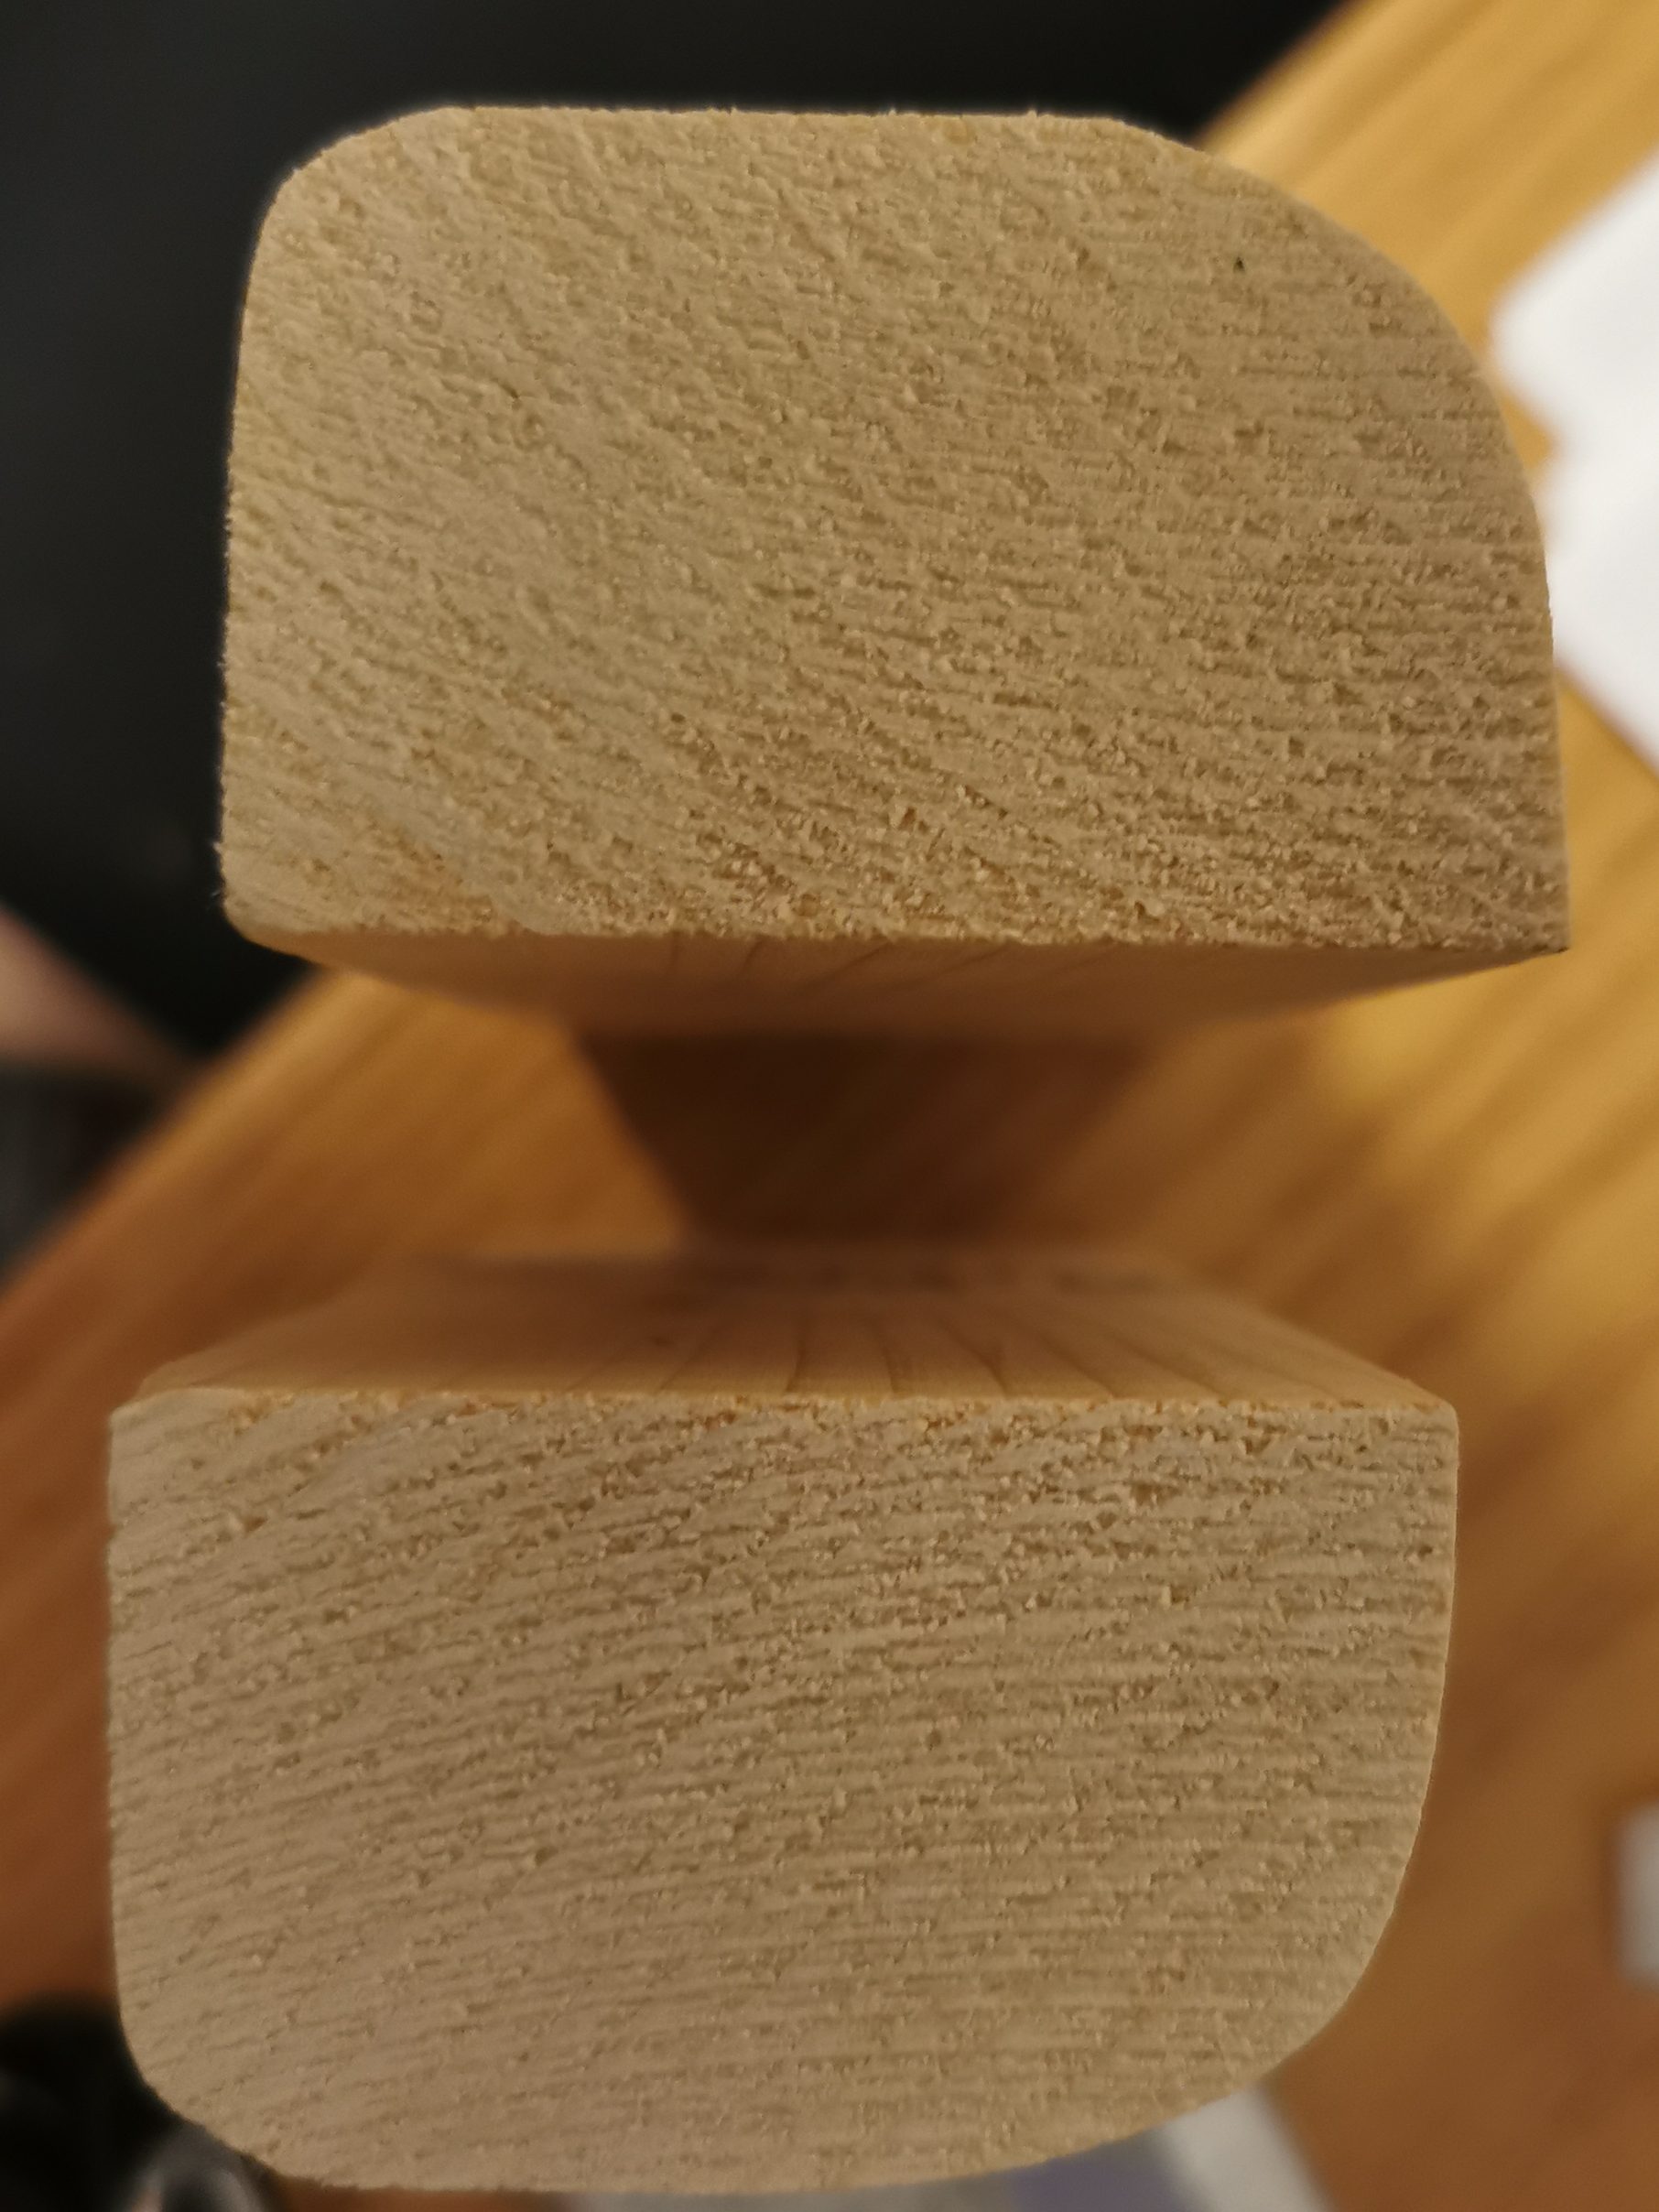
After shaping all of these holds, I put some screw holes in them so Jacob can stick them on the backboard he desires. I do this with the help of a drill press. The end product looks like this:

Leave a comment